交换机拿到手后先确认是什么品牌,该教程案例是用的S5720S-52P-LI-AC 先接电 然后 接console
默认交换机登录是没有密码的 如果有密码 那就需要重置初始化
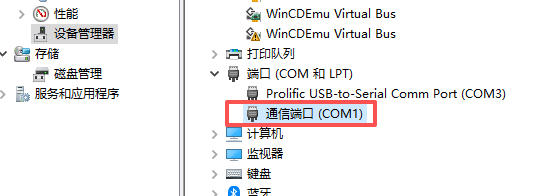
接好console后 前往设备管理器查看com口

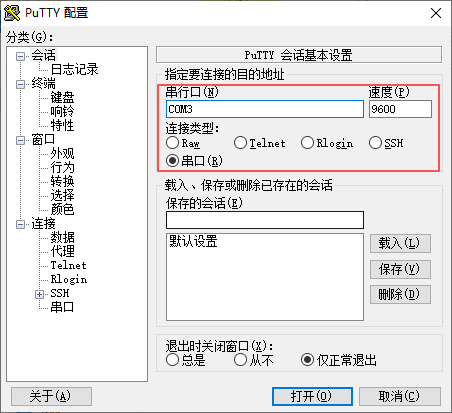
我这里是com3 使用putty 或者 其他连接工具进行连接 速率一般都是9600

连接之后 交换机先断电 然后 再接电 目的是重启交换机
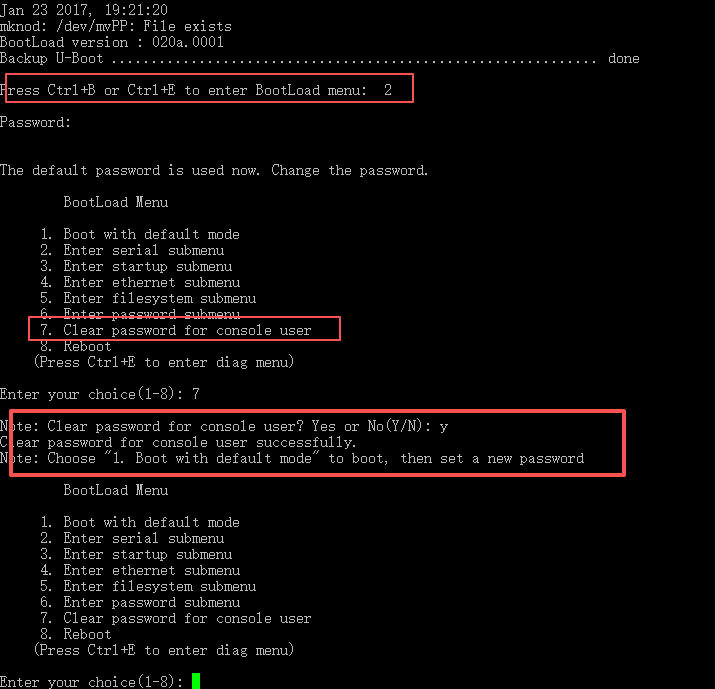
重启之后会看到 Press Ctrl+B or Ctrl+E to enter BootLoad
当界面出现以下打印信息时,及时按下快捷键“Ctrl+B”并输入BootROM/BootLoad密码,进入BootROM/BootLoad主菜单
密码: Admin@huawei.com A必须大写。这是进入boot的密码
选着7 Clear password for console user (选择清除console用户密码模式)。
选择1 Boot with default mode(键入1启动默认模式),进入后更改Console 及telnet密码。

敲完1回车后 会正常进入系统 然后 初始化交换机
输入:reset saved-configuration 接着问你是否初始化 选择“Y”
初始化之后,需要重启交换机才能生效 "reboot" 会提示是否需要保存现有配置文件作为下次启动 选择No即可
默认用户名和密码华为交换机的默认用户名是admin,密码是admin@huawei.com

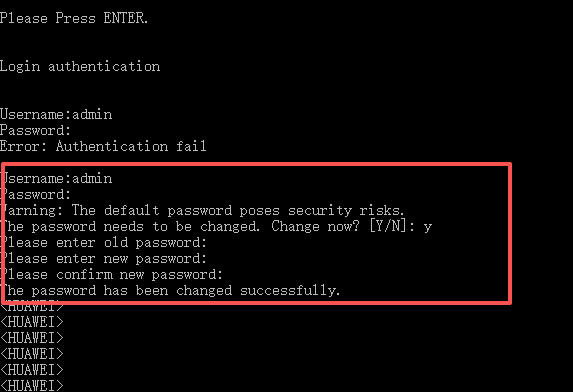
重启之后进入 需要修改默认con的密码

修改完成后交换机就初始化完成了 之后就是配置
]]>专注于文件管理的轻量级网页,界面简洁,支持多用户和基础的权限控制。
需要为不同的人设置不同的访问权限,同时又不想用太复杂的系统。
点击可以直接下载windows-amd64-filebrowser.zip
MyShare 的文件夹。filebrowser.zip 解压,将里面的 filebrowser.exe 文件复制到你刚创建的 MyShare 文件夹里。MyShare 文件夹里,双击运行 filebrowser.exe。这时会弹出一个命令行窗口,看到类似 Listening on 127.0.0.1:8080 的提示就说明启动成功了。注意:这个命令行窗口要保持打开,关掉服务就停了。访问网盘:打开浏览器,在地址栏输入 127.0.0.1:8080,就能看到 FileBrowser 的登录页面了。默认的用户名admin 密码为你打开filebrowser.exe 之后 命令行中会有提示如下 xxxx为你登录的密码
User 'admin' initialized with randomly generated password: xxxxFileBrowser 默认只监听 127.0.0.1(仅本机访问),外网请求进不来。
解决方法: 关掉 FileBrowser(关掉命令行窗口),然后用带参数的方式重新启动:
cmd
filebrowser.exe -a 0.0.0.0 -p 8080-a 0.0.0.0 表示监听所有网络接口-p 8080 指定端口启动后,在电脑上用浏览器访问 http://127.0.0.1:8080 确认能打开,然后再用手机流量访问 http://你的公网IP:8080 测试。

到了这一步骤就可以 自行 在本地目录中新增文件 从web页面中 进行分享 或者 下载等操作了
]]>安装环境
2680v4*2 64G 1TSSD Win2022系统
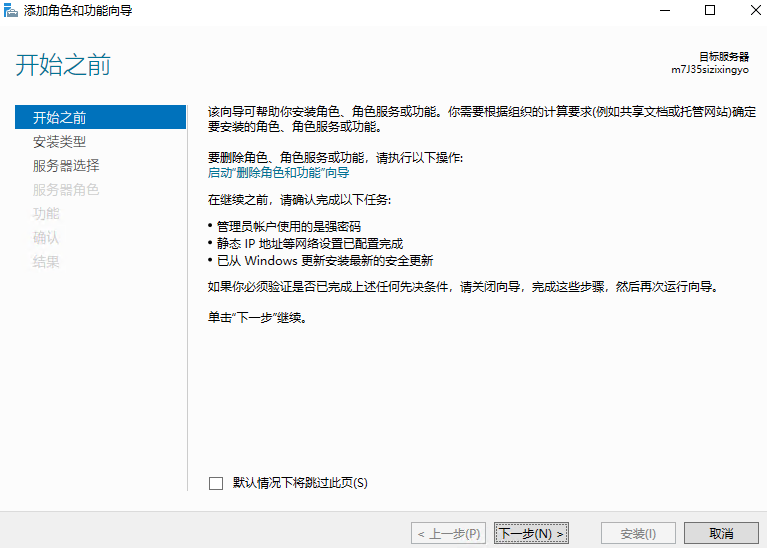
打开服务器管理器右上角的添加角色

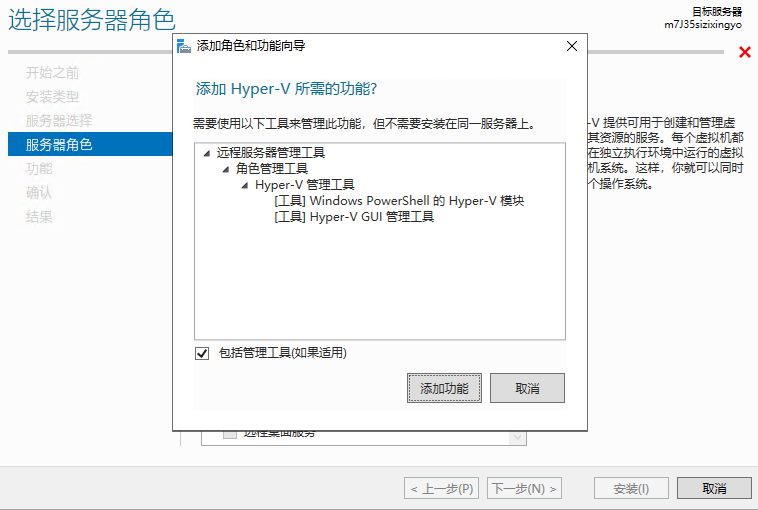
之后连续两个页面默认下一步,到了服务器角色这步选择Hyper-V

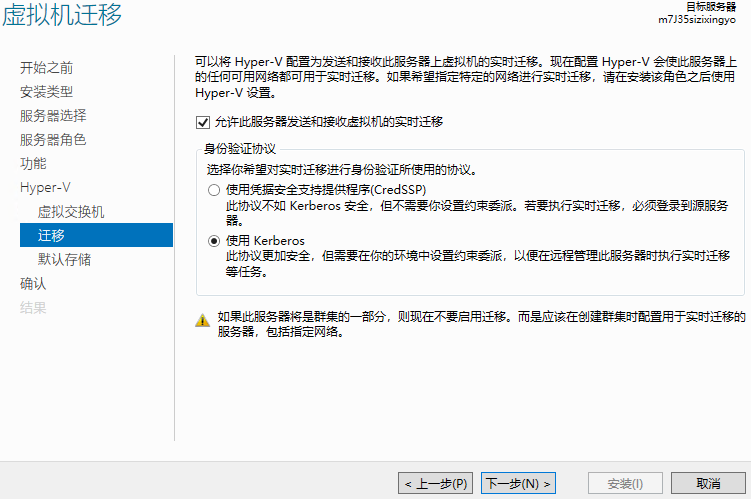
添加功能后点击下一步,之后三个页面都是默认下一步即可 到了迁移这里选择允许和第二个选项,之后点击下一步

下一步后要选择储存位置
虚拟硬盘文件默认位置:D:\Hyper-V\Virtual Hard Disks 虚拟机配置文件默认位置:D:\Hyper-V 一开始是没有对应目录的 需要提前手动创建
下一步后确认 勾选然后点击安装即可,机器会自动重启 重启后就安装成功了
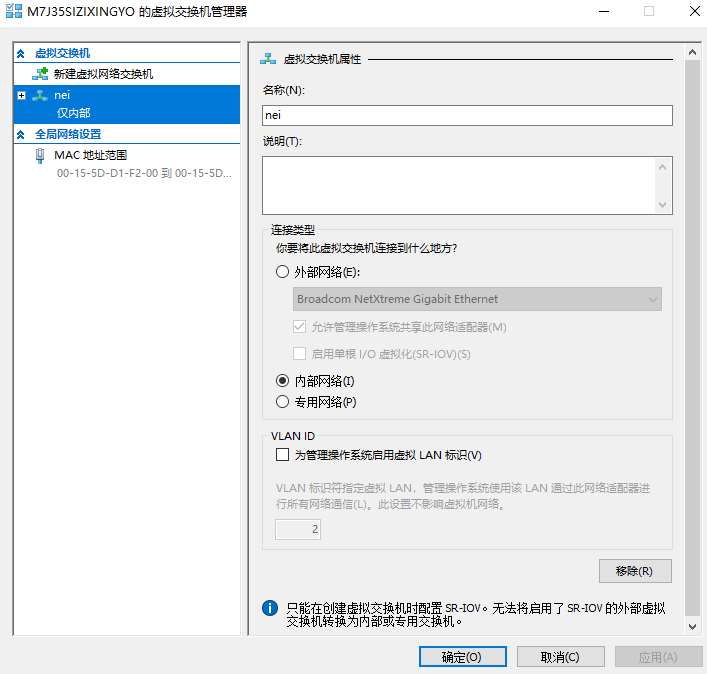
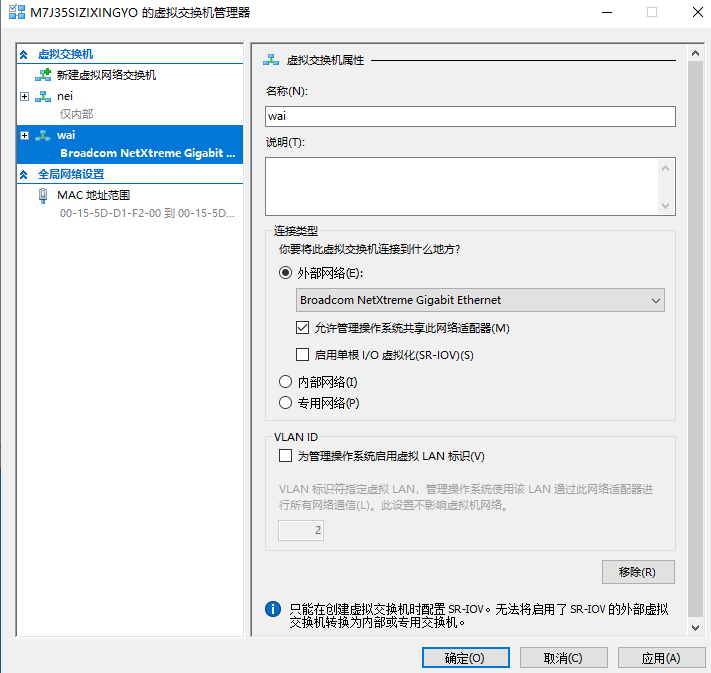
打开Hyper-V管理器,依次点击虚拟交换机管理器,新建内网、外网、nat 内网
外网
创建完成后在网络管理中会看到两个多出来的网卡,还有一个nat网卡

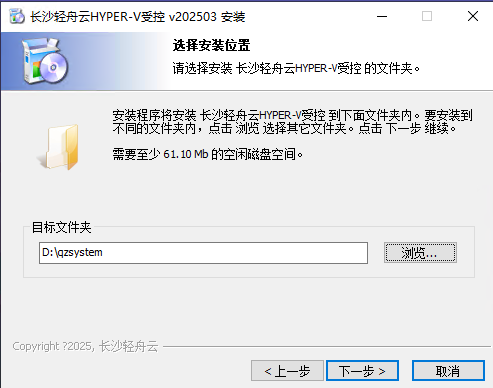
前往qzsystem - 轻舟云虚拟化KVM,HYPER-V管理平台创新者,免费VPS主机管理系统,KVM,QEMU,kvmvps,kvm,HYPER-V管理系统,hyper-v下行带宽限
下载最新的受控,安装到D盘即可
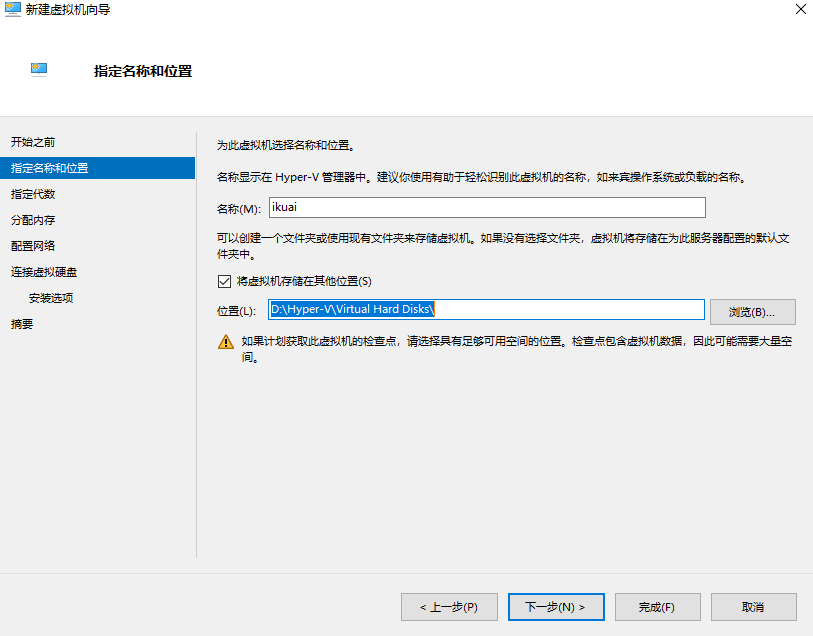
首先去官网下载最新镜像,下载好后使用Hyper创建虚拟机 安装ikuai8

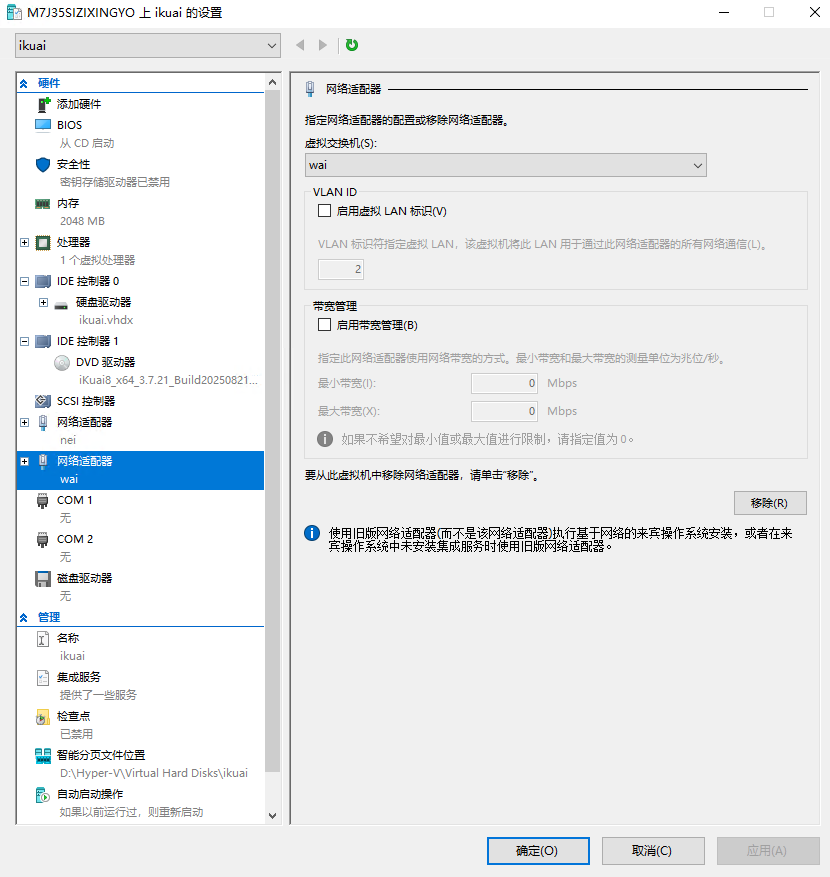
创建完成后继续去修改设置,添加内网外网适配器 还有镜像位置,都完成后 启动虚拟机进行安装

进入安装选择硬盘后确定安装 好了后 从设置中移除掉镜像才能使ikuai正常运行
进系统后首先绑定wan1口到eth1网卡(外网)上 绑定好后 前往 宿主机的 网络适配器的nei网卡配置ipv4(192.168.31.2/255.255.255.0/192.168.31.1 dns8.8.8.8即可)
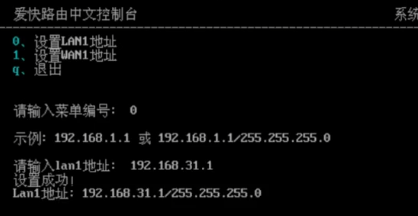
在ikuai设置lan1地址
然后设置wan1地址 按照服务商提供给你的宿主机ip网关掩码正常设置即可
之后登录192.168.31.1 默认账号密码为admin/admin 登录后首先依次点击网络设置-内外网设置-wan1 该设置是宿主机公网的配置信息 掩码修改为255.255.0.0 然后保存即可 返回后设置lan1 子网掩码也修改为255.255.0.0 保存即可
设置端口映射
DHCP服务端 
以上都设置完成后打开宿主机的网卡适配器 wai 这个网卡 将ipv4设置为DHCP 设置成功后机器会中断20秒左右 自动就好了
这样ikuai就安装完成了
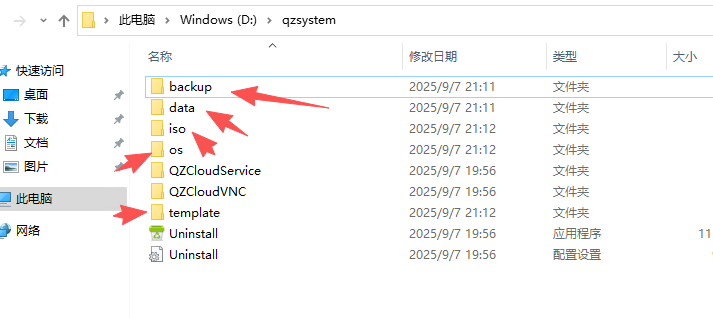
提前在轻舟的安装目录中创建文件夹iso、data、template、os、backup
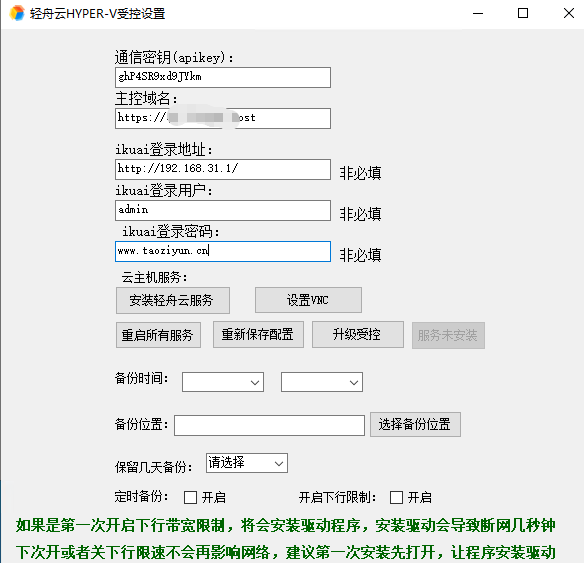
之后打开轻舟Hyper-V受控设置

按照如上填写即可 密钥和登录密码按照你们设置的即可 之后点击安装轻舟云服务、VNC服务
都完成后重启所有服务,之后重新保存配置就完设置了
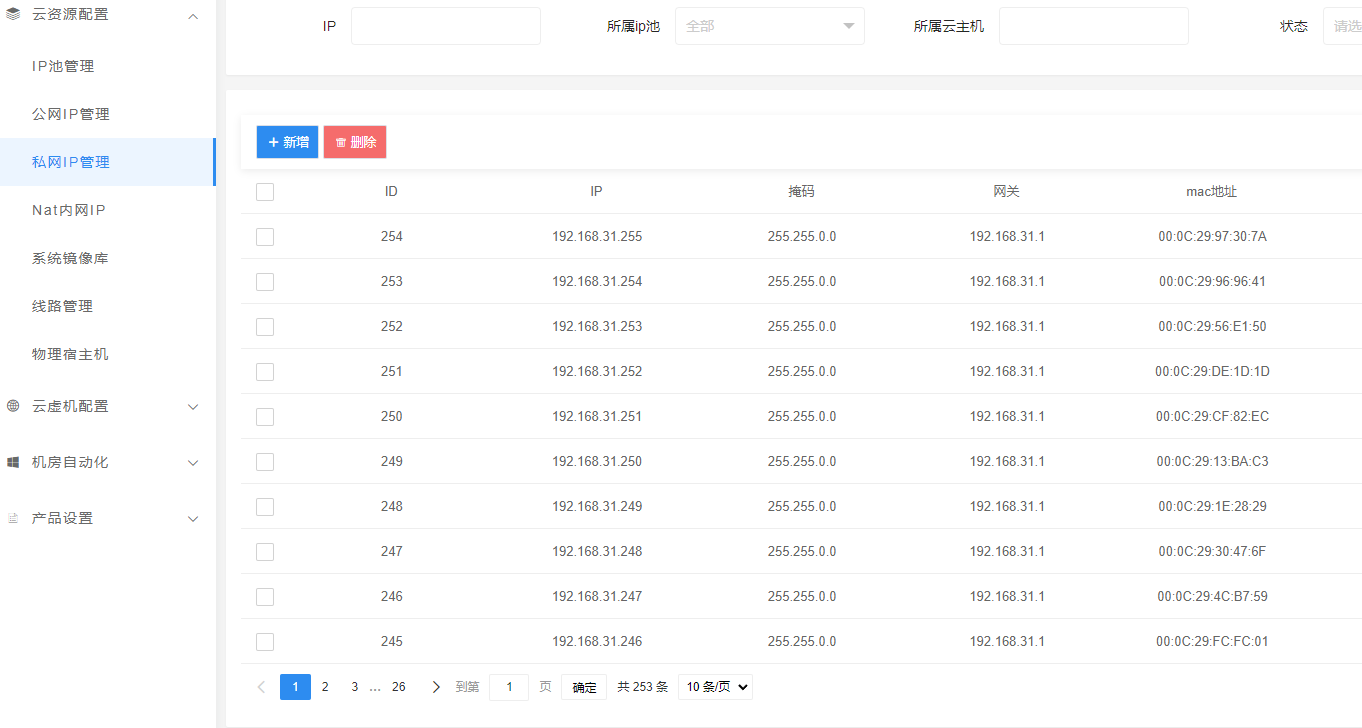
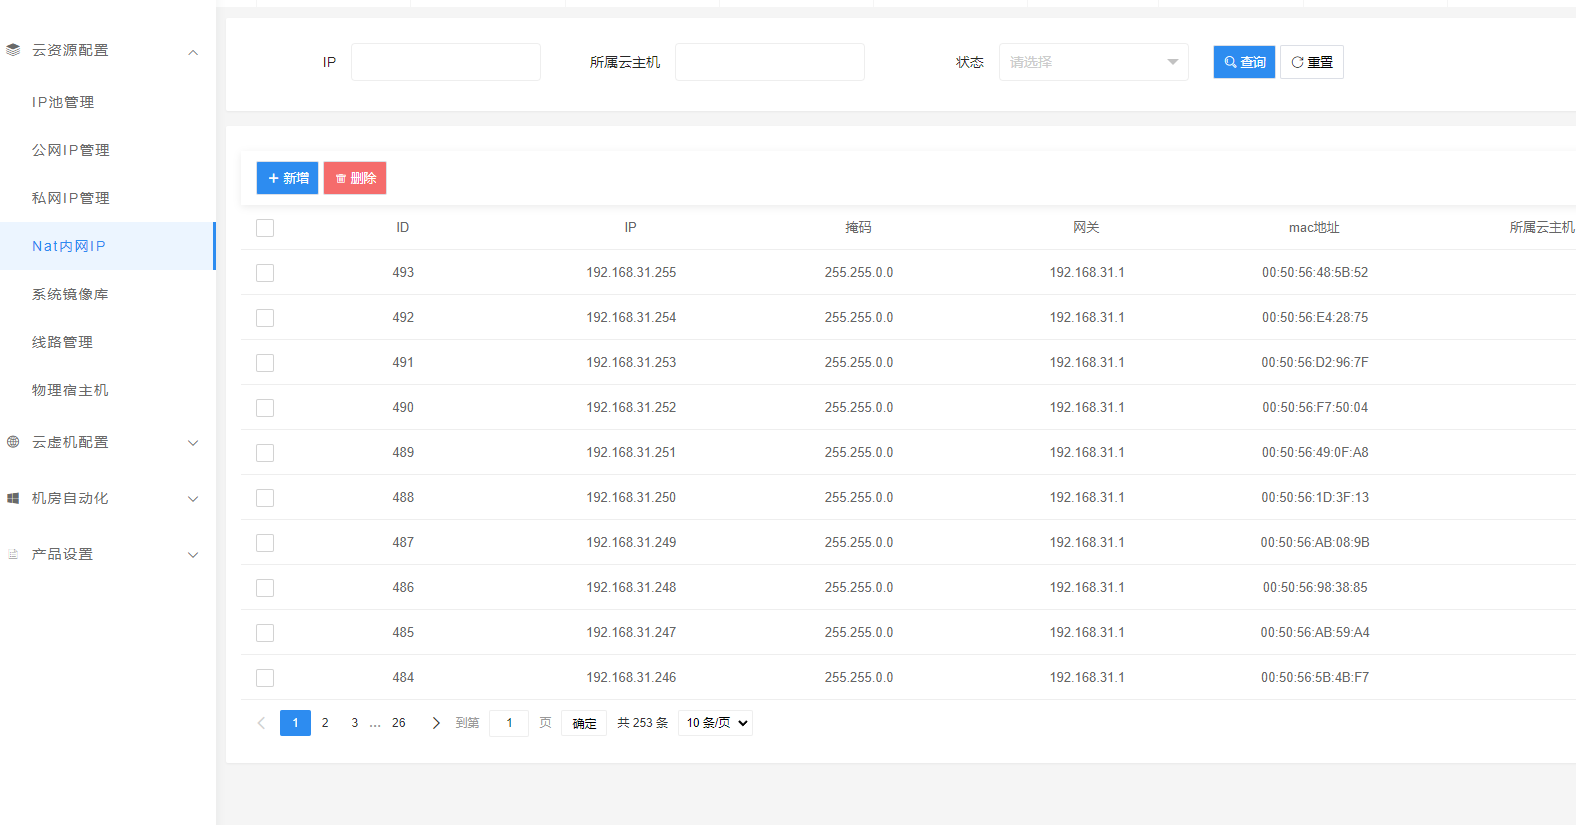
首先添加IP池、私网IP、Nat内网IP
私网IP和Nat内网IP都是添加之前在ikuai中添加的192.168.31.3-254/255.255.0.0/192.168.31.1


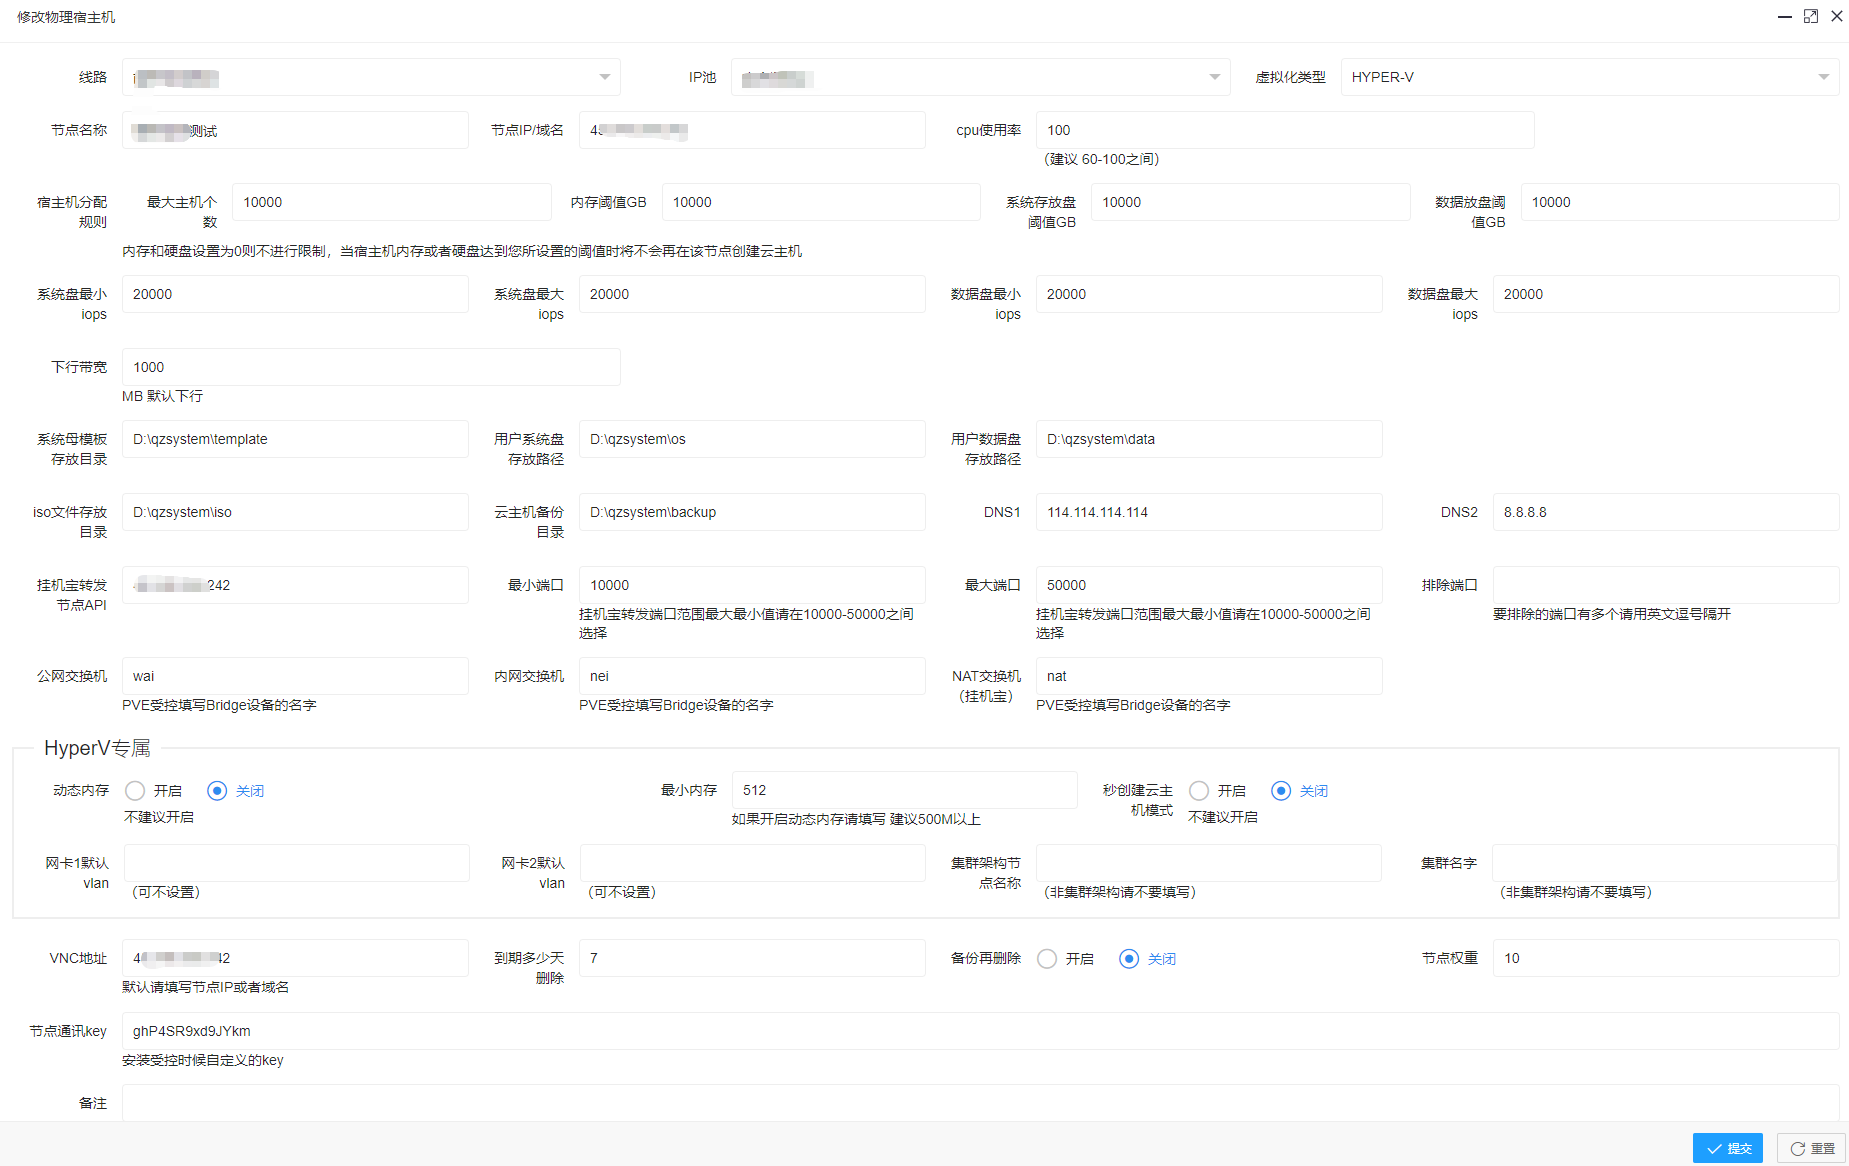
之后添加线路,最后添加物理宿主机

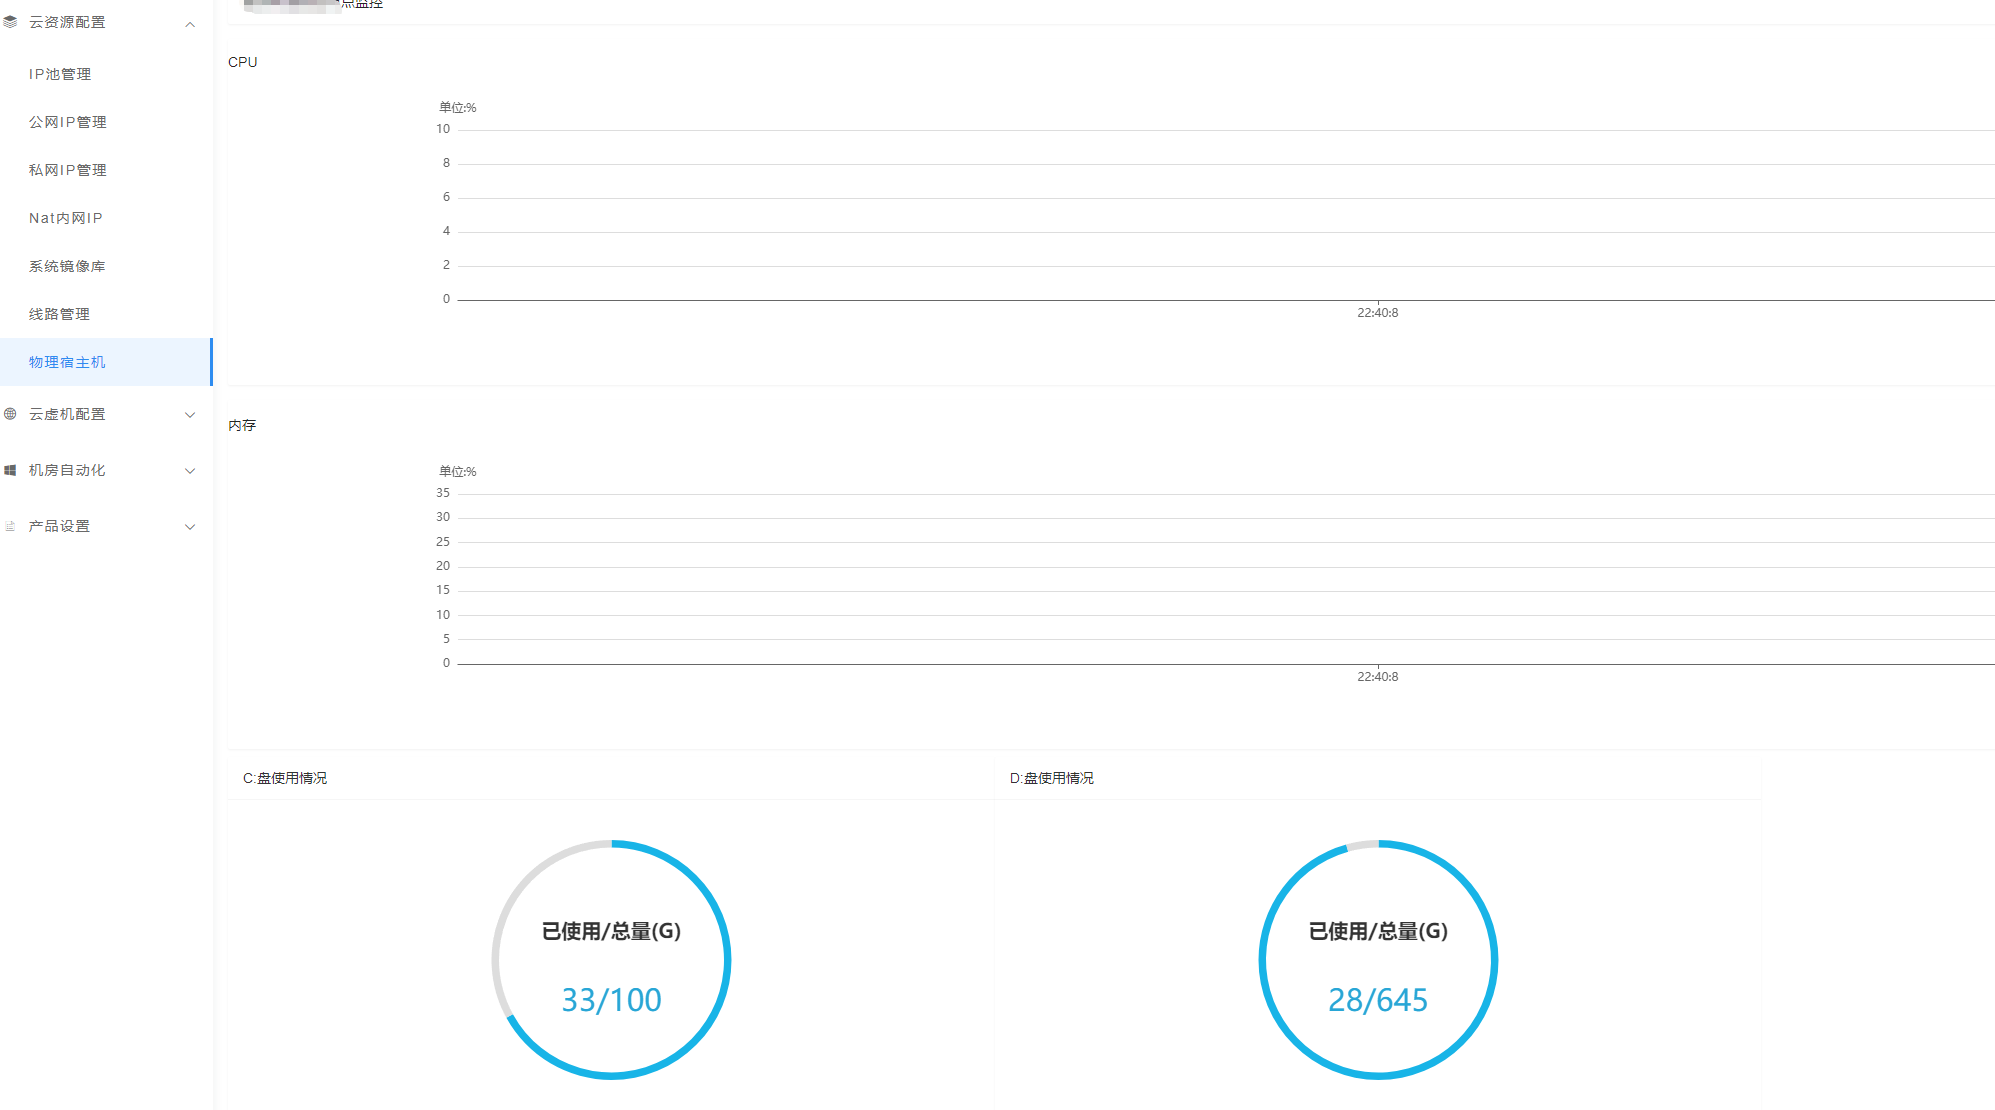
添加好物理机后查看监控

这样就完成了 可以去创建挂机宝了 选择共享ip

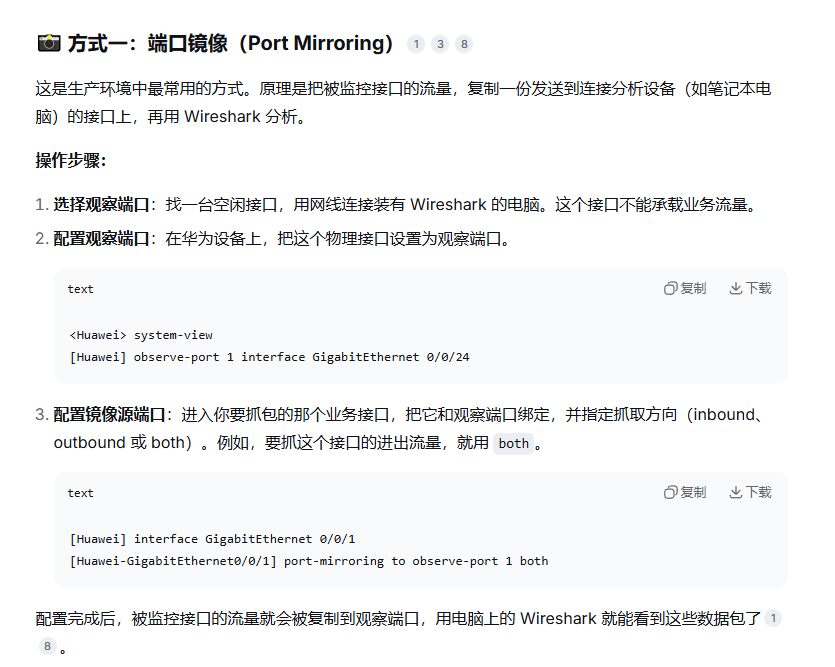
//将交换机连接监控设备的端口配置观察端口
//例如,将监控设备的端口GE0/0/20配置成观察端口
[SWA]observe-port 1 int g0/0/20
//将待镜像的报文流经的端口设置镜像端口,将这个端口需要镜像的方向,即接受或发送报文的方向绑定到观察端口
//将连接下游主机的端口GE0/0/7配置成镜像端口
[SWA]int g0/0/7
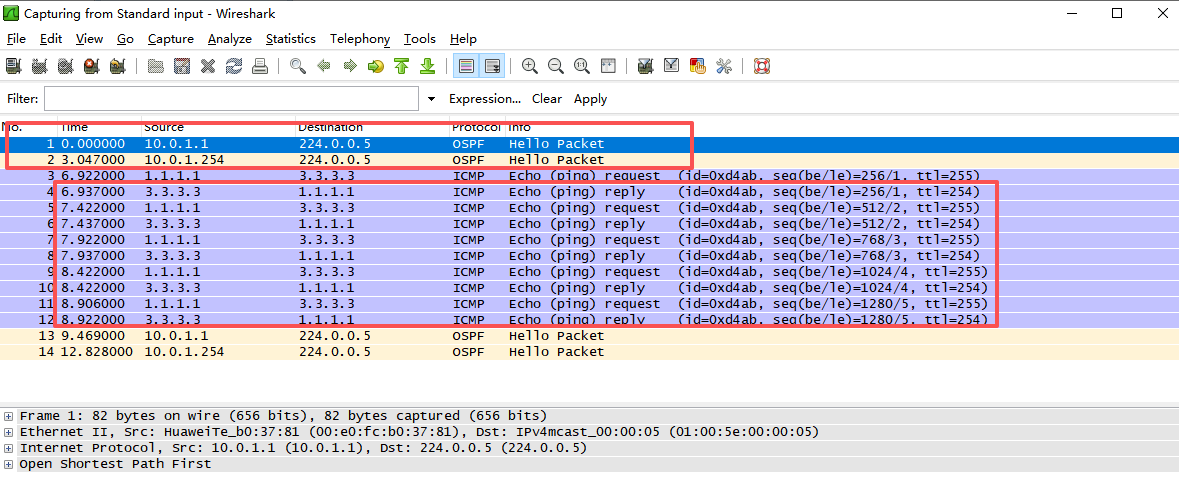
[SWA]port-mirroring to observe-port 1 inbound配置如上后,就可以在监控设备上启用监控软件,获取镜像报文
]]>
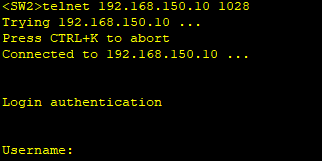
应用场景:两台物理交换机(同段)之间的telnet访问 SW2 可以 以AAA验证方式登录到SW1的VRP系统
已经配置好了交换机的vlanif 2端口ip (两台都在同段)
配置Telnet登录所用的VTY用户界面的终端属性,指定VTY 0\~4这5条VTY虚拟通道可以用于登录
[SW1]user-interface vty 0 4
[SW1-ui-vty0-4]idle-timeout 20 //设置超时间为20分钟
[SW1-ui-vty0-4]history-command max-size 20 //设置历史命令缓冲区的大小为20配置Telnet登录VTY用户界面的AAA验证方式和用户类别
[SW1-ui-vty0-4]authentication-mode aaa
[SW1-ui-vty0-4]user privilege level 15
[SW1-ui-vty0-4]q配置控制通过Telnet访问交换机的用户ACL策略
[SW1]user-interface maximum-vty 5 //设置VTY用户界面的最大个数
[SW1]acl 2001
[SW1-acl-basic-2001]rule permit source xxx //配置仅允许IP地址xx的主机访问
[SW1-acl-basic-2001]q
[SW1]user-interface vty 0 4
[SW1-ui-vty0-4]acl 2001 inbound //在VTY 0-4这5个用户界面中应用上面的ACL创建用于Telnet登录AAA验证的用户名和密码
[SW1]aaa
[SW1-aaa]local-user huawei password cipher hello@123 //设置用户密码
[SW1-aaa]local-user huawei service-type telnet //设置该用户的服务类型为telnet
[SW1-aaa]local-user huawei privilege level 15 //生效级别设置的15开启Telnet服务器功能,并设置端口
[SW1]telnet server enable
[SW1]telnet server port 1028测试结果查看,在SW2测试telnet交换机SW1

首先Esxi开启SSH

在没有插入USB硬盘前的操作
/etc/init.d/usbarbitrator stop
chkconfig usbarbitrator off
接入硬盘后查看是否识别
esxcli storage core device list | grep -i usb
查看USB硬盘信息,如下图,第一行就是,每个人的信息都不会一样的

partedUtil mklabel /dev/disks/mpx.vmhba33\:C0\:T0\:L0 gpt
partedUtil getptbl /dev/disks/mpx.vmhba33\:C0\:T0\:L0
换算硬盘的二进制数值
eval expr $(partedUtil getptbl /dev/disks/mpx.vmhba33\:C0\:T0\:L0 | tail -1 | awk '{print $1 " \\* " $2 " \\* " $3}') - 1
以下命令是让系统来识别我们的硬盘
partedUtil setptbl /dev/disks/mpx.vmhba33\:C0\:T0\:L0 gpt "1 2048 7814032064 AA31E02A400F11DB9590000C2911D1B8 0"
切换成vmfs5
vmkfstools -C vmfs5 -S USB_Datastore /dev/disks/mpx.vmhba33\:C0\:T0\:L0:1
回到esxi存储看,成功添加了一块USB硬盘

注:如果之后usb硬盘有换到别的usb口,esxi可能会一下无法识别到硬盘,需要将esxi重启一下即可。
]]>需要以下环境
大致功能:通过在K8s集群中部署blackbox工具(用于监控服务,检查网络可用性)和Grafana、Prometheus(监控可视化面板)更直观的体现网络连通性,可以进行警报和分析
本文章通过若海博客的【Kubernetes 集群上安装 Blackbox 监控网站状态】和【Kubernetes 集群上安装 Grafana 和 Prometheus】整合而成
确保主节点和子节点都有Docker环境(最好是同一个版本)
//安装Docker,一键安装(如有安装可以忽略)
curl -fsSL https://get.docker.com | bash -s docker --mirror Aliyun
//开启docker、并设置开机自启
systemctl start docker & systemctl enable docker
apt update
apt install -y wireguard
echo "net.ipv4.ip_forward = 1" >/etc/sysctl.d/ip_forward.conf
sysctl -p /etc/sysctl.d/ip_forward.conf
//以下Token值请保存,任意字符串
export SERVER_TOKEN=r83nui54eg8wihyiteshuo3o43gbf7u9er63o43gbf7uitujg8wihyitr6
export PUBLIC_IP=$(curl -Ls http://metadata.tencentyun.com/latest/meta-data/public-ipv4)
export PRIVATE_IP=$(curl -Ls http://metadata.tencentyun.com/latest/meta-data/local-ipv4)
export INSTALL_K3S_SKIP_DOWNLOAD=true
export DOWNLOAD_K3S_BIN_URL=https://github.com/k3s-io/k3s/releases/download/v1.28.2%2Bk3s1/k3s
if [ $(curl -Ls http://ipip.rehi.org/country_code) == "CN" ]; then
DOWNLOAD_K3S_BIN_URL=https://ghproxy.com/${DOWNLOAD_K3S_BIN_URL}
fi
curl -Lo /usr/local/bin/k3s $DOWNLOAD_K3S_BIN_URL
chmod a+x /usr/local/bin/k3s
curl -Ls https://get.k3s.io | sh -s - server \
--cluster-init \
--token $SERVER_TOKEN \
--node-ip $PRIVATE_IP \
--node-external-ip $PUBLIC_IP \
--advertise-address $PRIVATE_IP \
--service-node-port-range 5432-9876 \
--flannel-backend wireguard-native \
--flannel-external-ip//安装Docker,一键安装(如有安装可以忽略)
curl -fsSL https://get.docker.com | bash -s docker --mirror Aliyun
//开启docker、并设置开机自启
systemctl start docker & systemctl enable docker
//子节点代码
apt update
apt install -y wireguard
echo "net.ipv4.ip_forward = 1" >/etc/sysctl.d/ip_forward.conf
sysctl -p /etc/sysctl.d/ip_forward.conf
export SERVER_IP=43.129.195.33 //此ip填你的主节点地址
export SERVER_TOKEN=r83nui54eg8wihyiteshuo3o43gbf7u9er63o43gbf7uitujg8wihyitr6
export PUBLIC_IP=$(curl -Ls http://metadata.tencentyun.com/latest/meta-data/public-ipv4)
export PRIVATE_IP=$(curl -Ls http://metadata.tencentyun.com/latest/meta-data/local-ipv4)
export INSTALL_K3S_SKIP_DOWNLOAD=true
export DOWNLOAD_K3S_BIN_URL=https://github.com/k3s-io/k3s/releases/download/v1.28.2%2Bk3s1/k3s
if [ $(curl -Ls http://ipip.rehi.org/country_code) == "CN" ]; then
DOWNLOAD_K3S_BIN_URL=https://ghproxy.com/${DOWNLOAD_K3S_BIN_URL}
fi
curl -Lo /usr/local/bin/k3s $DOWNLOAD_K3S_BIN_URL
chmod a+x /usr/local/bin/k3s
curl -Ls https://get.k3s.io | sh -s - agent \
--server https://$SERVER_IP:6443 \
--token $SERVER_TOKEN \
--node-ip $PRIVATE_IP \
--node-external-ip $PUBLIC_IP//拉取镜像
docker pull rehiy/blackbox
//一键启动
docker run -d \
--name blackbox \
--restart always \
--publish 9115:9115 \
--env "NODE_NAME=guangzhou-taozi" \
--env "NODE_OWNER=Taozi" \
--env "NODE_REGION=广州" \
--env "NODE_ISP=TencentCloud" \
--env "NODE_BANNER=From Taozii-www.xiongan.host" \
rehiy/blackbox
//开始注册
docker logs -f blackbox
在主节点创建一个目录,名字任意,然后在同一目录中创建两个文件(grafpro.yaml、grafpro.sh)
kind: Deployment
apiVersion: apps/v1
metadata:
name: &name grafpro
labels:
app: *name
spec:
selector:
matchLabels:
app: *name
template:
metadata:
labels:
app: *name
spec:
initContainers:
- name: busybox
image: busybox
command:
- sh
- -c
- |
if [ ! -f /etc/prometheus/prometheus.yml ]; then
cat <<EOF >/etc/prometheus/prometheus.yml
global:
scrape_timeout: 25s
scrape_interval: 1m
evaluation_interval: 1m
scrape_configs:
- job_name: prometheus
static_configs:
- targets:
- 127.0.0.1:9090
EOF
fi
volumeMounts:
- name: *name
subPath: etc
mountPath: /etc/prometheus
containers:
- name: grafana
image: grafana/grafana
securityContext:
runAsUser: 0
ports:
- containerPort: 3000
volumeMounts:
- name: *name
subPath: grafana
mountPath: /var/lib/grafana
- name: prometheus
image: prom/prometheus
securityContext:
runAsUser: 0
ports:
- containerPort: 9090
volumeMounts:
- name: *name
subPath: etc
mountPath: /etc/prometheus
- name: *name
subPath: prometheus
mountPath: /prometheus
volumes:
- name: *name
hostPath:
path: /srv/grafpro
type: DirectoryOrCreate
---
kind: Service
apiVersion: v1
metadata:
name: &name grafpro
labels:
app: *name
spec:
selector:
app: *name
ports:
- name: grafana
port: 3000
targetPort: 3000
- name: prometheus
port: 9090
targetPort: 9090
---
kind: Ingress
apiVersion: networking.k8s.io/v1
metadata:
name: &name grafpro
annotations:
traefik.ingress.kubernetes.io/router.entrypoints: web,websecure
spec:
rules:
- host: grafana.example.org
http:
paths:
- path: /
pathType: Prefix
backend:
service:
name: *name
port:
name: grafana
- host: prometheus.example.org
http:
paths:
- path: /
pathType: Prefix
backend:
service:
name: *name
port:
name: prometheus
tls:
- secretName: default//警告:请修改路径和访问域名
# 配置存储路径
export GRAFPRO_STORAGE=${GRAFPRO_STORAGE:-"/srv/grafpro"}
# 配置访问域名
export GRAFANA_DOMAIN=${GRAFPRO_DOMAIN:-"grafana.example.org"}
export PROMETHEUS_DOMAIN=${PROMETHEUS_DOMAIN:-"prometheus.example.org"}
# 修改参数并部署服务
cat grafpro.yaml \
| sed "s#/srv/grafpro#$GRAFPRO_STORAGE#g" \
| sed "s#grafana.example.org#$GRAFANA_DOMAIN#g" \
| sed "s#prometheus.example.org#$PROMETHEUS_DOMAIN#g" \
| kubectl apply -f -chmod +x grafpro.sh
./grafpro.sh注意以下,开启端口9115、9090
浏览器打开地址http://grafana.example.org 账号密码都是admin,首次登录,提示修改密码,修改后自动跳到控制台
浏览器打开http://grafana.example.org/connections/datasources/选择第一个,然后编辑URL为:http://127.0.0.1:9090 然后保存
然后选择创建好的Prometheus,导入面板
浏览器打开http://prometheus.example.org,查看信息


//回到主节点的/srv/grafpro/etc目录下
编辑yml文件,备份一下原有的yml,创建新的yml
mv prometheus.yml prometheus00.yml
//以下是yml文件内容(若部署时修改了负载名称blackbox-exporter,下文的配置文件也要做相应的修改)
global:
scrape_timeout: 15s
scrape_interval: 1m
evaluation_interval: 1m
scrape_configs:
# prometheus
- job_name: prometheus
static_configs:
- targets:
- 127.0.0.1:9090
# blackbox_all
- job_name: blackbox_all
static_configs:
- targets:
- blackbox-gz:9115
labels:
region: '广州,腾讯云'
# http_status_gz
- job_name: http_status_gz
metrics_path: /probe
params:
module: [http_2xx] #配置get请求检测
static_configs:
- targets:
- https://www.example.com
labels:
project: 测试1
desc: 测试网站描述1
- targets:
- https://www.example.org
labels:
project: 测试2
desc: 测试网站描述2
basic_auth:
username: ******
password: ******
relabel_configs:
- target_label: region
replacement: '广州,腾讯云'
- source_labels: [__address__]
target_label: __param_target
- source_labels: [__param_target]
target_label: instance
- target_label: __address__
replacement: blackbox-gz:9115:80然后重启svc,方法如下:首先查看pod
kubectl get pod
然后删除查看到关于grafana的pod,然后稍等几分钟即可
kubectl delete pod *下载附件json在Grafana仪表盘里导入即可

导入后可以查看到监控仪已经开始了,显示各项信息


//主节点代码
apt update
apt install -y wireguard
echo "net.ipv4.ip_forward = 1" >/etc/sysctl.d/ip_forward.conf
sysctl -p /etc/sysctl.d/ip_forward.conf
export SERVER_TOKEN=r83nui54eg8wihyiteshuo3o43gbf7u9er63o43gbf7uitujg8wihyitr6
export PUBLIC_IP=$(curl -Ls http://metadata.tencentyun.com/latest/meta-data/public-ipv4)
export PRIVATE_IP=$(curl -Ls http://metadata.tencentyun.com/latest/meta-data/local-ipv4)
export INSTALL_K3S_SKIP_DOWNLOAD=true
export DOWNLOAD_K3S_BIN_URL=https://github.com/k3s-io/k3s/releases/download/v1.28.2%2Bk3s1/k3s
if [ $(curl -Ls http://ipip.rehi.org/country_code) == "CN" ]; then
DOWNLOAD_K3S_BIN_URL=https://ghproxy.com/${DOWNLOAD_K3S_BIN_URL}
fi
curl -Lo /usr/local/bin/k3s $DOWNLOAD_K3S_BIN_URL
chmod a+x /usr/local/bin/k3s
curl -Ls https://get.k3s.io | sh -s - server \
--cluster-init \
--token $SERVER_TOKEN \
--node-ip $PRIVATE_IP \
--node-external-ip $PUBLIC_IP \
--advertise-address $PRIVATE_IP \
--service-node-port-range 5432-9876 \
--flannel-backend wireguard-native \
--flannel-external-ip
//子节点代码
apt update
apt install -y wireguard
echo "net.ipv4.ip_forward = 1" >/etc/sysctl.d/ip_forward.conf
sysctl -p /etc/sysctl.d/ip_forward.conf
export SERVER_IP=43.129.195.33
export SERVER_TOKEN=r83nui54eg8wihyiteshuo3o43gbf7u9er63o43gbf7uitujg8wihyitr6
export PUBLIC_IP=$(curl -Ls http://metadata.tencentyun.com/latest/meta-data/public-ipv4)
export PRIVATE_IP=$(curl -Ls http://metadata.tencentyun.com/latest/meta-data/local-ipv4)
export INSTALL_K3S_SKIP_DOWNLOAD=true
export DOWNLOAD_K3S_BIN_URL=https://github.com/k3s-io/k3s/releases/download/v1.28.2%2Bk3s1/k3s
if [ $(curl -Ls http://ipip.rehi.org/country_code) == "CN" ]; then
DOWNLOAD_K3S_BIN_URL=https://ghproxy.com/${DOWNLOAD_K3S_BIN_URL}
fi
curl -Lo /usr/local/bin/k3s $DOWNLOAD_K3S_BIN_URL
chmod a+x /usr/local/bin/k3s
curl -Ls https://get.k3s.io | sh -s - agent \
--server https://$SERVER_IP:6443 \
--token $SERVER_TOKEN \
--node-ip $PRIVATE_IP \
--node-external-ip $PUBLIC_IP
//docker配置镜像加速器
sudo mkdir -p /etc/docker
sudo tee /etc/docker/daemon.json <<-'EOF'
{
"registry-mirrors": ["https://wml59v5w.mirror.aliyuncs.com"]
}
EOF
sudo systemctl daemon-reload
sudo systemctl restart docker
//非集群机器安装集群管理面板kuboard
sudo docker run -d \
--restart=unless-stopped \
--name=kuboard \
-p 80:80/tcp \
-p 10081:10081/udp \
-p 10081:10081/tcp \
-e KUBOARD_ENDPOINT="http://kuboard.my-company.com:80" \
-e KUBOARD_AGENT_SERVER_UDP_PORT="10081" \
-e KUBOARD_AGENT_SERVER_TCP_PORT="10081" \
-v /root/kuboard-data:/data \
eipwork/kuboard:v3.1.7.1
]]>
作为VPN服务器的Win2003 添加一张网卡用于连接内部权限子网的端口
选择路由和远程访问


选择配置VPN服务器

选择外网网卡

IP地址指定→自动
名称和地址转换服务→启用基本的名称和地址服务
管理多个远程访问服务器→否
完成后确定

在XP系统中进行配置,添加网络连接


网络连接→虚拟专用网络连接
连接名→随意
VPN服务器选择→win2003的ip地址

下一步完成后就会弹出一个登陆窗口,此时需要去win 2003VPN服务器中创建新的用户和密码

设置用户权限

在XP端中成功登录连接后

运行cmd命令执行ipconfig,可以查看客户机已经获取的新地址与内部网络一致了

查看到时随机地址,只需要去VPN服务器中修改配置,改为静态地址即可

再次测试,就可以看到是自定义的静态地址池

进入AWS管理控制台中,创建VPC,包括单个可用区中的一个 VPC、一个互联网网关、一个公有子网和一个私有子网,以及两个路由表和一个 NAT 网关。
lab。展开 Customize subnets CIDR blocks(自定义子网 CIDR 块)部分
10.0.0.0/2410.0.1.0/24
创建成功

lab-subnet-public210.0.2.0/24此子网将包含所有以 10.0.2.x 开头的 IP 地址。

lab-vpclab-subnet-private210.0.3.0/24此子网将包含所有以 10.0.3.x 开头的 IP 地址。

现在,您将配置这个新的私有子网,将流向互联网的流量路由到 NAT 网关,以便第二个私有子网中的资源能够连接到互联网,同时这些资源仍然保持私有。这是通过配置路由表完成的。
路由表包含一组规则(称为路由),用于确定网络流量的流向。VPC 中的每个子网必须与一个路由表相关联;而路由表控制子网的路由。
此路由表用于路由来自私有子网的流量。

此路由表用于公有子网的流量

Web Security GroupEnable HTTP access配置以下设置:
Permit web requests
配置网络设置:
在 Network settings(网络设置)旁边,选择 Edit(编辑),然后配置:
接下来,您将实例配置为使用之前创建的 Web Security Group。
配置一个脚本,在实例启动时在实例上运行此脚本:
滚动到页面底部,然后复制下面显示的代码并将其粘贴到 User data(用户数据)框中:
#!/bin/bash
# Install Apache Web Server and PHP
dnf install -y httpd wget php mariadb105-server
# Download Lab files
wget https://aws-tc-largeobjects.s3.us-west-2.amazonaws.com/CUR-TF-100-ACCLFO-2/2-lab2-vpc/s3/lab-app.zip
unzip lab-app.zip -d /var/www/html/
# Turn on web server
chkconfig httpd on
service httpd start此脚本将在实例的来宾操作系统上以根用户权限运行,并且会在实例首次启动时自动运行。此脚本将安装一个 Web 服务器、一个数据库和 PHP 库,然后在 Web 服务器上下载并安装 PHP Web 应用程序。