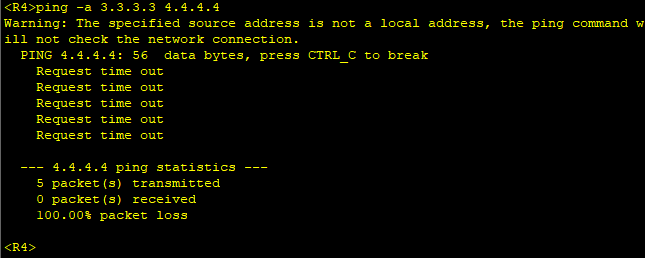
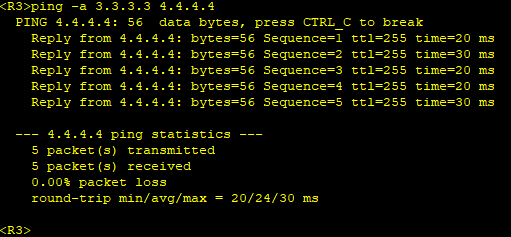
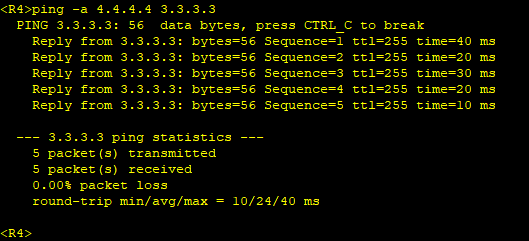
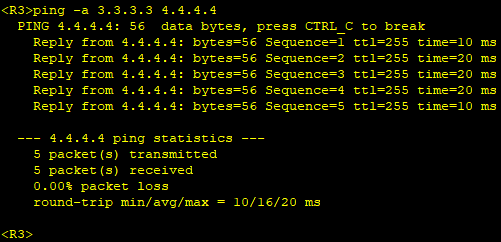
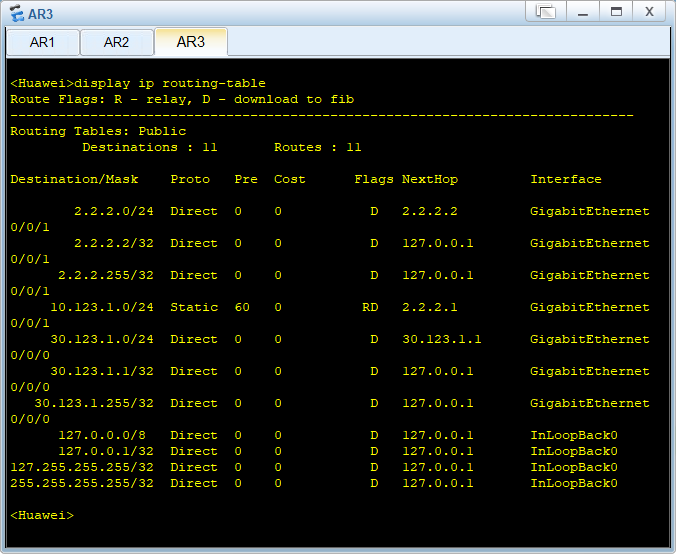
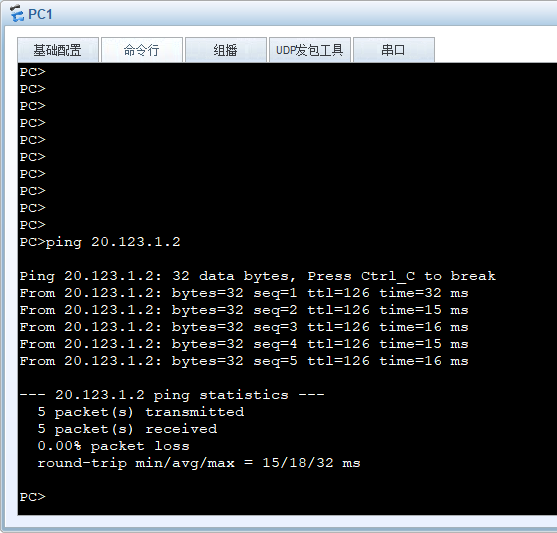
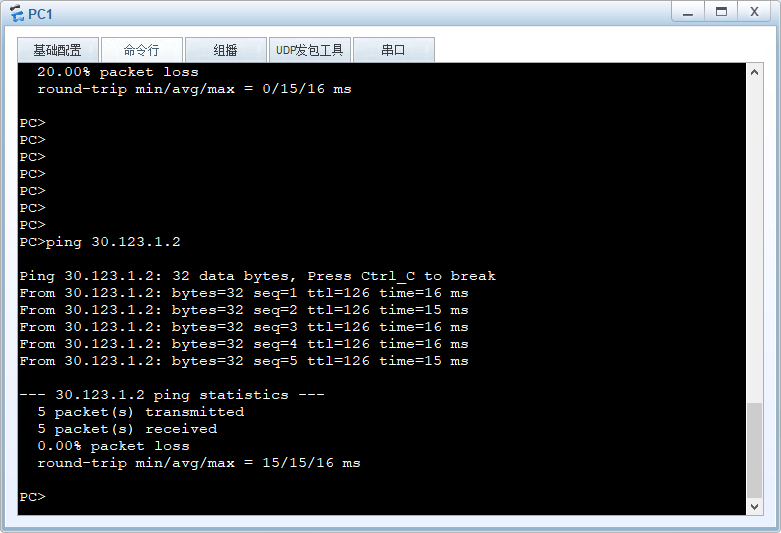
首先配置各个路由器及接口ip地址
R1:
[R1-ospf-1]dis this
[V200R003C00]
#
ospf 1 router-id 1.1.1.1
area 0.0.0.0
network 10.1.1.1 0.0.0.0
network 10.123.12.1 0.0.0.0
#
return
R2:
[R2-ospf-1]dis this
[V200R003C00]
#
ospf 1 router-id 2.2.2.2
area 0.0.0.0
network 10.123.12.2 0.0.0.0
network 10.123.23.2 0.0.0.0
network 20.1.1.1 0.0.0.0
#
return
R3:
[R3-ospf-1]dis this
[V200R003C00]
#
ospf 1 router-id 3.3.3.3
area 0.0.0.0
network 10.123.23.3 0.0.0.0
network 10.123.34.3 0.0.0.0
network 30.1.1.1 0.0.0.0
#
return
R4:
[R4-ospf-1]dis this
[V200R003C00]
#
ospf 1 router-id 4.4.4.4
area 0.0.0.0
network 10.123.34.4 0.0.0.0
network 10.123.45.4 0.0.0.0
network 40.1.1.1 0.0.0.0
#
return
R5:
[R5-ospf-1]dis this
[V200R003C00]
#
ospf 1 router-id 5.5.5.5
area 0.0.0.0
network 10.123.45.5 0.0.0.0
#
return
在R9上检查路由表
在R1上配置MPLS
在R2上配置MPLS
在R3上配置MPLS
在R4上配置MPLS
在R1上配置静态LSP
R1作为ingress设备在去往40.1.1.1/32和 10.123.45.0/24网络时打上标签,同时作为egress设备,当收到标签为201或者205时弹出标签进行路由转发。
[R1]static-lsp ingress 1to4 destination 40.1.1.1 32 nexthop 10.123.12.2 out-labe
l 104
[R1]static-lsp ingress 1to45 destination 10.123.45.0 24 nexthop 10.123.12.2 out-
label 105
[R1]static-lsp egress 4to1 incoming-interface g0/0/0 in-label 201
[R1]static-lsp egress 45to1 incoming-interface g0/0/0 in-label 205
在R2上配置静态LSP
R2作为Transit设备进行标签的交换。
[R2]static-lsp transit 1to4 incoming-interface GigabitEthernet 0/0/0 in-label 10
4 nexthop 10.123.23.3 out-label 204
[R2]static-lsp transit 1to45 incoming-interface GigabitEthernet 0/0/0 in-label 1
05 nexthop 10.123.23.3 out-label 205
[R2]static-lsp transit 4to1 incoming-interface GigabitEthernet0/0/1 in-label 301
nexthop 10.123.12.1 out-label 201
[R2]static-lsp transit 45to1 incoming-interface GigabitEthernet0/0/1 in-label 30
5 nexthop 10.123.12.1 out-label 205
在R3上配置静态LSP
R3作为Transit设备进行标签交换。
[R3]static-lsp transit 1to4 incoming-interface GigabitEthernet 0/0/0 in-label 20
4 nexthop 10.123.34.4 out-label 304
[R3]static-lsp transit 4to1 incoming-interface GigabitEthernet0/0/1 in-label 401
nexthop 10.123.23.2 out-label 301
[R3]static-lsp transit 1to45 incoming-interface GigabitEthernet 0/0/0 in-label 2
05 nexthop 10.123.23.3 out-label 305
[R3]static-lsp transit 45to1 incoming-interface GigabitEthernet0/0/1 in-label 40
5 nexthop 10.123.23.2 out-label 305
在R4上配置静态LSP
R4与R1类似,同样既作为ingress设备又作为egress设备。作为ingress设备在去往40.1.1.1/32和 10.123.45.0/24网络时打上标签,同时作为egress设备,当收到标签为201或者205时弹出标签进行路由转发。
[R4]static-lsp egress 1to4 incoming-interface g0/0/0 in-label 304
[R4]static-lsp egress 1to45 incoming-interface g0/0/0 in-label 305
[R4]static-lsp ingress 4to1 destination 10.1.1.1 32 nexthop 10.123.34.3 out-labe
l 401
在R1上查看标签交换路径:
标签路径中有In/Out Label,在mpls中,Out Label为空时,表示该FEC是由本路由器向上游发布标签,该路由器一般是该FEC的egress设备。In Label是指本路由器为某个FEC分配给对端的Out Label标签,当In Label为空时,表示本路由器是该LSP的最上游路由器,一般是ingress设备。
在R2上查看
在R3上查看
在R4上查看
在R1上Ping测试
右键点击R1设备,选择数据抓包中的G0/0/0接口进行抓包。在R1上带环回口ping测试R4的环回口地址。
进入抓包界面,点击源为10.1.1.1,目的地址为40.1.1.1的数据包查看。我们可以观察到,在数据包中存在MPLS的头部,由此,判断出10.1.1.1访问40.1.1.1走的是MPLS的路径。
]]>//R2上新添加一个loopback1
ip add 10.2.2.2 24
<R2>ping -c 1 10.123.12.1
PING 10.123.12.1: 56 data bytes, press CTRL_C to break
Reply from 10.123.12.1: bytes=56 Sequence=1 ttl=255 time=220 ms
--- 10.123.12.1 ping statistics ---
1 packet(s) transmitted
1 packet(s) received
0.00% packet loss
round-trip min/avg/max = 220/220/220 ms
<R2>ping -c 1 10.123.23.3
PING 10.123.23.3: 56 data bytes, press CTRL_C to break
Reply from 10.123.23.3: bytes=56 Sequence=1 ttl=255 time=100 ms
--- 10.123.23.3 ping statistics ---
1 packet(s) transmitted
1 packet(s) received
0.00% packet loss
round-trip min/avg/max = 100/100/100 ms
<R2>ping -c 1 10.123.24.4
PING 10.123.24.4: 56 data bytes, press CTRL_C to break
Reply from 10.123.24.4: bytes=56 Sequence=1 ttl=255 time=170 ms
--- 10.123.24.4 ping statistics ---
1 packet(s) transmitted
1 packet(s) received
0.00% packet loss
round-trip min/avg/max = 170/170/170 ms
<R3>ping -c 1 10.123.34.4
PING 10.123.34.4: 56 data bytes, press CTRL_C to break
Reply from 10.123.34.4: bytes=56 Sequence=1 ttl=255 time=40 ms
--- 10.123.34.4 ping statistics ---
1 packet(s) transmitted
1 packet(s) received
0.00% packet loss
round-trip min/avg/max = 40/40/40 ms
R1、R2、R3、R4使用Loopback0接口地址作为Router ID,在各个设备的互联接口、Loopback0接口激活OSPF。
[R1-ospf-1-area-0.0.0.0]dis this
[V200R003C00]
#
area 0.0.0.0
network 10.0.1.1 0.0.0.0
network 10.123.12.1 0.0.0.0
#
return
[R2-ospf-1-area-0.0.0.0]dis this
[V200R003C00]
#
area 0.0.0.0
network 10.0.2.2 0.0.0.0
network 10.123.12.2 0.0.0.0
network 10.123.23.2 0.0.0.0
network 10.123.24.2 0.0.0.0
#
return
[R3-ospf-1-area-0.0.0.0]dis this
[V200R003C00]
#
area 0.0.0.0
network 10.0.3.3 0.0.0.0
network 10.123.23.3 0.0.0.0
network 10.123.34.3 0.0.0.0
#
return
[R4-ospf-1-area-0.0.0.0]dis this
[V200R003C00]
#
area 0.0.0.0
network 10.0.4.4 0.0.0.0
network 10.123.24.4 0.0.0.0
network 10.123.34.4 0.0.0.0
#
return
查看R4的OSPF路由表
可以看出来已经学到了全网路由
bgp 64511
在R2、R3上查看IBGP对等体状态
AS内的IBGP对等体关系成功建立
[R2]bgp 64511
[R2-bgp]peer 10.123.12.1 reflect-client
[R3]bgp 64511
[R3-bgp]peer 10.123.23.2 reflect-client
[R4]bgp 64511
[R4-bgp]peer 10.123.34.3 reflect-client
在本步骤中,我们将在R2上发布BGP路由10.2.2.0/24,并观察该路由依次经路由反射器R3、R4反射后,被通告回R2从而引发潜在路由环路风险的情况。
缺省情况下,R2发布BGP路由后,该路由将被R2直接通告给R4,另一方面也会通过R3反射给R4,此时R4将优选R2直接通告过来的路由,从而不会再将R3反射过来的路由再反射回给R2。为此,我们需要在R2上部署路由策略,使R2不直接向R4通告10.2.2.0/24路由。
//在BGP中调用路由策略
[R2]bgp 64511
[R2-bgp]peer 10.123.24.4 route-policy bgp export
//在R2上发布路由
[R2]bgp 64511
[R2-bgp] network 10.2.2.0 24
在R2、R3上查看BGP路由10.2.2.0/24信息
在R4上查看BGP路由10.2.2.0/24的信息
//让R4重新发送Update报文
<R2>refresh bgp 10.123.24.4 import
查看R2上Update报文收发数量
取消R2上的BGP路由发布
[R2]bgp 64511
[R2-bgp] undo network 10.2.2.0 24
一次查看R1、R2、R3、R4上BGP路由的10.1.1.0/24的信息
R1为BGP路由10.1.1.0/24的始发者,R1将路由通告给了R2(10.0.12.2)
来自路由反射器客户端R1的BGP路由10.1.1.0/24,R2将其反射给了R3(10.0.23.3)
来自路由反射器客户端R2的BGP路由10.1.1.0/24,R2反射时添加了Cluster_List属性,值为10.0.2.2,R3*将该条路由反射给了R4(10.0.34.4)
来自路由反射器客户端R3的BGP路由10.1.1.0/24,R3反射时添加了Cluster_List属性的值,当前值为10.0.3.3,10.0.2.2,R4将该条路由反射给了R2(10.0.24.2)
再次查看R2的BGP路由表
在R2上查看BGP对等体10.123.24.4的详细信息
R2从R4收到了1个Update报文,未向R4发送Update报文(路由策略限制),但是本地BGP路由表中没有R4通告的BGP路由10.1.1.0/24。
在R2上触发入方向的软复位,让R4重新发送Update报文
<R2>refresh bgp 10.123.24.4 import
<R2>display bgp peer 10.123.24.4 verbose | in Update
Update-group ID: 1
Update messages 2
Update messages 0
接收的Update报文数量增加,R2从R4收到了BGP路由10.1.1.0/24的通告。
再次查看R2上BGP路由10.1.1.0 24的明细信息
依旧只有来自R1通告的1条BGP路由,R4通告的BGP路由其Cluster_List属性值中包含了R2的Cluster-ID,R2忽略了该路由通告。
]]>主机名 | ip | 角色 |
---|---|---|
ovs | 192.168.123.10 | ovs |
首先连接SSH
用finalshell连接,需要提前配置好ip和网卡
上传ovs源文件,并解压
进入目录,执行./configure,生成Makefile文件
然后进入编译安装
make
make install
使用Opendaylight虚拟机
安装jdk1.8,并启动opendaylight
安装组件:
首先清理旧数据
DELETE http://127.0.0.1:8181/restconf/config/opendaylight-inventory:nodes/node/openflow:1/
然后CLI命令行里再次清理
sudo mn -c
生成拓扑并连接 OpenDaylight
sudo mn --topo=single,3 --controller=remote,ip=本机ip,port=6633 --switch ovsk,protocols=OpenFlow13
使用 Postman 填入 JSON 格式的 http 请求
//以下内容是Body中需要填写的
{
"flow": [
{
"id": "1",
"match": {
"in-port": "1",
"ethernet-match": {
"ethernet-type": {
"type": "0x0800"
}
},
"ipv4-destination": "10.0.0.3/32"
},
"instructions": {
"instruction": [
{
"order": "0",
"apply-actions": {
"action": [
{
"order": "0",
"drop-action": {}
}
]
}
}
]
},
"flow-name": "flow1",
"priority": "65535",
"hard-timeout": "5", //此处需要修改间隔,意味着h1 ping h3 有5秒时间是中断的
"cookie": "2",
"table_id": "0"
}
]
}
现在CLI中h1 ping h3,再去PUT数据链接
测试成功,结果符合预期
鸣谢:小桂哥,King
]]>//R2上新添加一个loopback1
ip add 10.2.2.2 24
<R2>ping -c 1 10.123.12.1
PING 10.123.12.1: 56 data bytes, press CTRL_C to break
Reply from 10.123.12.1: bytes=56 Sequence=1 ttl=255 time=220 ms
--- 10.123.12.1 ping statistics ---
1 packet(s) transmitted
1 packet(s) received
0.00% packet loss
round-trip min/avg/max = 220/220/220 ms
<R2>ping -c 1 10.123.23.3
PING 10.123.23.3: 56 data bytes, press CTRL_C to break
Reply from 10.123.23.3: bytes=56 Sequence=1 ttl=255 time=100 ms
--- 10.123.23.3 ping statistics ---
1 packet(s) transmitted
1 packet(s) received
0.00% packet loss
round-trip min/avg/max = 100/100/100 ms
<R2>ping -c 1 10.123.24.4
PING 10.123.24.4: 56 data bytes, press CTRL_C to break
Reply from 10.123.24.4: bytes=56 Sequence=1 ttl=255 time=170 ms
--- 10.123.24.4 ping statistics ---
1 packet(s) transmitted
1 packet(s) received
0.00% packet loss
round-trip min/avg/max = 170/170/170 ms
<R3>ping -c 1 10.123.34.4
PING 10.123.34.4: 56 data bytes, press CTRL_C to break
Reply from 10.123.34.4: bytes=56 Sequence=1 ttl=255 time=40 ms
--- 10.123.34.4 ping statistics ---
1 packet(s) transmitted
1 packet(s) received
0.00% packet loss
round-trip min/avg/max = 40/40/40 ms
R1、R2、R3、R4使用Loopback0接口地址作为Router ID,在各个设备的互联接口、Loopback0接口激活OSPF。
[R1-ospf-1-area-0.0.0.0]dis this
[V200R003C00]
#
area 0.0.0.0
network 10.0.1.1 0.0.0.0
network 10.123.12.1 0.0.0.0
#
return
[R2-ospf-1-area-0.0.0.0]dis this
[V200R003C00]
#
area 0.0.0.0
network 10.0.2.2 0.0.0.0
network 10.123.12.2 0.0.0.0
network 10.123.23.2 0.0.0.0
network 10.123.24.2 0.0.0.0
#
return
[R3-ospf-1-area-0.0.0.0]dis this
[V200R003C00]
#
area 0.0.0.0
network 10.0.3.3 0.0.0.0
network 10.123.23.3 0.0.0.0
network 10.123.34.3 0.0.0.0
#
return
[R4-ospf-1-area-0.0.0.0]dis this
[V200R003C00]
#
area 0.0.0.0
network 10.0.4.4 0.0.0.0
network 10.123.24.4 0.0.0.0
network 10.123.34.4 0.0.0.0
#
return
查看R4的OSPF路由表
可以看出来已经学到了全网路由
bgp 64511
在R2、R3上查看IBGP对等体状态
AS内的IBGP对等体关系成功建立
[R2]bgp 64511
[R2-bgp]peer 10.123.12.1 reflect-client
[R3]bgp 64511
[R3-bgp]peer 10.123.23.2 reflect-client
[R4]bgp 64511
[R4-bgp]peer 10.123.34.3 reflect-client
在本步骤中,我们将在R2上发布BGP路由10.2.2.0/24,并观察该路由依次经路由反射器R3、R4反射后,被通告回R2从而引发潜在路由环路风险的情况。
缺省情况下,R2发布BGP路由后,该路由将被R2直接通告给R4,另一方面也会通过R3反射给R4,此时R4将优选R2直接通告过来的路由,从而不会再将R3反射过来的路由再反射回给R2。为此,我们需要在R2上部署路由策略,使R2不直接向R4通告10.2.2.0/24路由。
//在BGP中调用路由策略
[R2]bgp 64511
[R2-bgp]peer 10.123.24.4 route-policy bgp export
//在R2上发布路由
[R2]bgp 64511
[R2-bgp] network 10.2.2.0 24
在R2、R3上查看BGP路由10.2.2.0/24信息
在R4上查看BGP路由10.2.2.0/24的信息
//让R4重新发送Update报文
<R2>refresh bgp 10.123.24.4 import
查看R2上Update报文收发数量
取消R2上的BGP路由发布
[R2]bgp 64511
[R2-bgp] undo network 10.2.2.0 24
一次查看R1、R2、R3、R4上BGP路由的10.1.1.0/24的信息
R1为BGP路由10.1.1.0/24的始发者,R1将路由通告给了R2(10.0.12.2)
来自路由反射器客户端R1的BGP路由10.1.1.0/24,R2将其反射给了R3(10.0.23.3)
来自路由反射器客户端R2的BGP路由10.1.1.0/24,R2反射时添加了Cluster_List属性,值为10.0.2.2,R3将该条路由反射给了R4(10.0.34.4)
来自路由反射器客户端R3的BGP路由10.1.1.0/24,R3反射时添加了Cluster_List属性的值,当前值为10.0.3.3,10.0.2.2,R4将该条路由反射给了R2(10.0.24.2)
再次查看R2的BGP路由表
在R2上查看BGP对等体10.123.24.4的详细信息
R2从R4收到了1个Update报文,未向R4发送Update报文(路由策略限制),但是本地BGP路由表中没有R4通告的BGP路由10.1.1.0/24。
在R2上触发入方向的软复位,让R4重新发送Update报文
<R2>refresh bgp 10.123.24.4 import
<R2>display bgp peer 10.123.24.4 verbose | in Update
Update-group ID: 1
Update messages 2
Update messages 0
接收的Update报文数量增加,R2从R4收到了BGP路由10.1.1.0/24的通告。
再次查看R2上BGP路由10.1.1.0 24的明细信息
依旧只有来自R1通告的1条BGP路由,R4通告的BGP路由其Cluster_List属性值中包含了R2的Cluster-ID,R2忽略了该路由通告。
]]>
案例要求:需要不通网段的PC1与PC2、PC3主机分别ping通
准备:三台PC端主机、三台路由器(AR2220)
操作:
Switch1:
#
sysname S1
#
vlan batch 10 40 50
#
interface Vlanif40
ip address 10.1.4.2 255.255.255.252
#
interface Vlanif50
ip address 10.1.4.5 255.255.255.252
#
interface Vlanif10
ip address 10.1.1.1 255.255.255.0
#
interface GigabitEthernet0/0/1
port link-type trunk
port trunk allow-pass vlan 10
#
interface GigabitEthernet0/0/2
port link-type trunk
port trunk allow-pass vlan 40
#
interface GigabitEthernet0/0/3
port link-type access
port default vlan 50
#
ip route-static 10.1.2.0 255.255.255.0 10.1.4.1
ip route-static 10.1.3.0 255.255.255.0 10.1.4.6
#
return
Switch2:
#
sysname S2
#
vlan batch 20 40
#
interface Vlanif40
ip address 10.1.4.1 255.255.255.252
#
interface Vlanif20
ip address 10.1.2.1 255.255.255.0
#
interface GigabitEthernet0/0/1
port link-type trunk
port trunk allow-pass vlan 40
#
interface GigabitEthernet0/0/2
port link-type access
port default vlan 20
#
ip route-static 0.0.0.0 0.0.0.0 10.1.4.2
#
return
Switch3:
#
sysname S3
#
vlan batch 30 50
#
interface Vlanif50
ip address 10.1.4.6 255.255.255.252
#
interface Vlanif30
ip address 10.1.3.1 255.255.255.0
#
interface GigabitEthernet0/0/1
port link-type trunk
port trunk allow-pass vlan 50
#
interface GigabitEthernet0/0/2
port link-type access
port default vlan 30
#
ip route-static 0.0.0.0 0.0.0.0 10.1.4.5
#
return
测试连通性(10.1.2.1 ping 10.1.3.1)
]]>